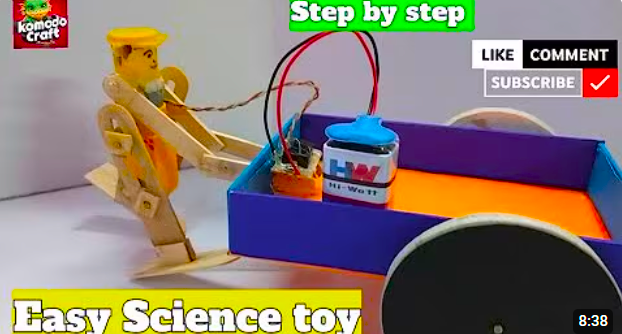
Creating a DIY science toy can be an exciting project for children and adults alike, blending creativity with basic engineering concepts. In this detailed guide, we will walk you through the process of making a motorized toy car using a gear motor, cardboard, color pastel sheets, and other easily accessible materials. This fun and educational activity introduces basic principles of motion, energy transfer, and mechanics.
Materials Needed:
To create this motorized science toy, you will need the following materials:
- Gear motor
- Ice cream stick
- Super glue
- Wooden stick
- Cardboard
- Color pastel sheet
Step 1: Designing the Toy Car Base
The first step in creating your science toy is to design a sturdy base for the motorized car:
- Cut the Base:
- Measure and cut a rectangular piece of cardboard (approximately 15 cm x 8 cm) for the car’s chassis.
- Reinforce the base by adding another layer of cardboard glued on top.
- Color and Decorate:
- Cover the base with a color pastel sheet using double-sided tape or glue for a vibrant appearance.
- Feel free to customize with patterns or additional designs.
Step 2: Preparing the Wheels and Axles
- Create the Wheels:
- Use four bottle caps as wheels.
- Drill a small hole at the center of each cap to accommodate the axle.
- Make the Axles:
- Cut two wooden skewers or metal rods slightly longer than the car’s width.
- Insert the skewers through the holes in the bottle caps to form the wheel-axle assembly.
- Attach the Axles:
- Secure the axles to the base using small pieces of cardboard as support brackets.
- Ensure the wheels rotate freely.
Step 3: Installing the Gear Motor
- Position the Motor:
- Place the gear motor near the rear axle.
- Ensure the motor’s output shaft aligns with the rear wheels.
- Secure the Motor:
- Use a hot glue gun to attach the motor securely to the cardboard base.
- Connect the Motor to the Axle:
- Attach a small pulley or gear to the motor shaft.
- Use a rubber band or a small belt to connect the motor shaft to the rear axle, ensuring it can drive the wheels.
Step 4: Electrical Connections
- Battery Holder Setup:
- Attach the battery holder with a switch on top of the car using glue.
- Wiring:
- Connect the positive wire of the battery holder to the positive terminal of the gear motor.
- Connect the negative wire to the motor’s negative terminal.
- Secure the wiring with tape and ensure proper insulation.
- Power Test:
- Insert the batteries and switch on the motor to test the movement.
- Adjust the belt tension if the wheels don’t rotate smoothly.
Step 5: Final Adjustments and Decorations
- Balance Check:
- Ensure the car is balanced and the wheels spin freely.
- Additional Decorations:
- Add stickers, drawings, or more pastel sheets to personalize the car further.
Step 6: Understanding the Science Behind It
This DIY toy car demonstrates several scientific principles:
- Energy Transfer: Chemical energy from the batteries converts into electrical energy, which then transforms into mechanical energy through the motor.
- Gear Mechanism: The gear motor helps in controlling the speed and torque of the wheels.
- Friction and Motion: The wheels moving against the surface demonstrate friction and motion concepts.
Related – Wild Court Working Model
Why DIY Science Toys are Important
- Hands-on Learning: Interactive models make abstract scientific concepts more tangible and easier to understand.
- Creativity Boost: Encourages students to think outside the box and innovate.
- Critical Thinking: Promotes problem-solving and analytical skills.
- Collaboration: Working in groups enhances teamwork and communication skills.
- Cost-effective: Many DIY toys can be made with readily available household items.
Categories
- 3D Models
- Biology Models
- Chemistry Model
- economic project
- Exhibition models
- Math Models
- Physics Model
- Projects
- Science Models
- Uncategorized
- Working Model
Tips for Creating an Impressive School Exhibition Model
- Explain the Concept Clearly: Attach a label with a brief explanation.
- Neatness Matters: Keep the model clean and well-organized.
- Interactive Elements: Try to make the model interactive.
- Use Recycled Materials: Incorporate eco-friendly materials.
- Practice Demonstration: Rehearse explaining your model
Conclusion
Building a motorized science toy using a gear motor, cardboard, and color pastel sheets is a rewarding project that merges creativity with learning. This activity introduces basic concepts of electricity, mechanics, and energy transfer in a fun, hands-on manner. Encourage young learners to explore modifications, like adding propellers or different gear ratios, to deepen their understanding further. Happy crafting and experimenting!
How to Make DIY Science Toys for School Exhibitions?
Creating DIY science toys and working models for school exhibitions can be a fun and educational experience for students of all ages. These projects not only help in understanding scientific principles but also encourage creativity, problem-solving skills, and teamwork. This comprehensive guide will explore various easy-to-make science toys and working models suitable for school exhibitions, along with step-by-step instructions and explanations of the scientific concepts involved.
